3D Printed Kayak Rod Holders: Gear Track and Rail Mounts
3D printed kayak rod holder mounts for gear track and round rail: Ø40 vs Ø50 tubes, required stainless hardware, PETG printing notes, and honest limits.
Auf Deutsch: Rutenhalter und Angelzubehör aus dem 3D-Drucker
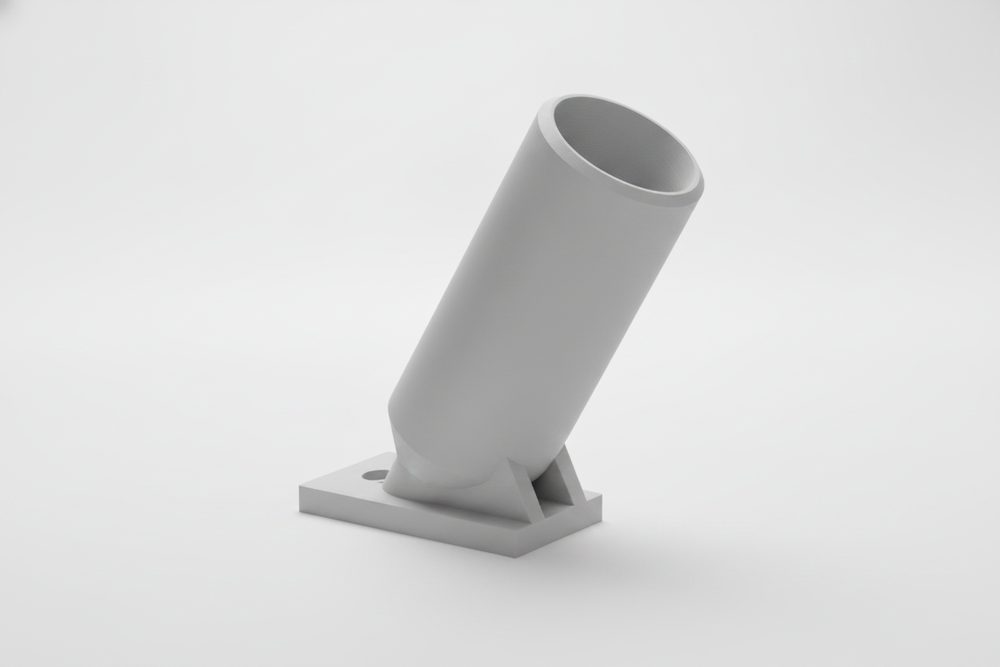
A rod holder that bolts straight to your kayak's gear track or rail solves the most basic problem on the water: somewhere to put the rod down that isn't your lap. Fishing3D's kayak mounts are ready-made 3D-printed tubes you bolt onto the gear track or round rail you already have — pick the base that matches your kayak and the tube size that fits your rod. This guide covers both base styles, both tube sizes, mounting, the hardware, and what a printed part like this can and can't do on the water.
Gear track or round rail: what does your kayak have
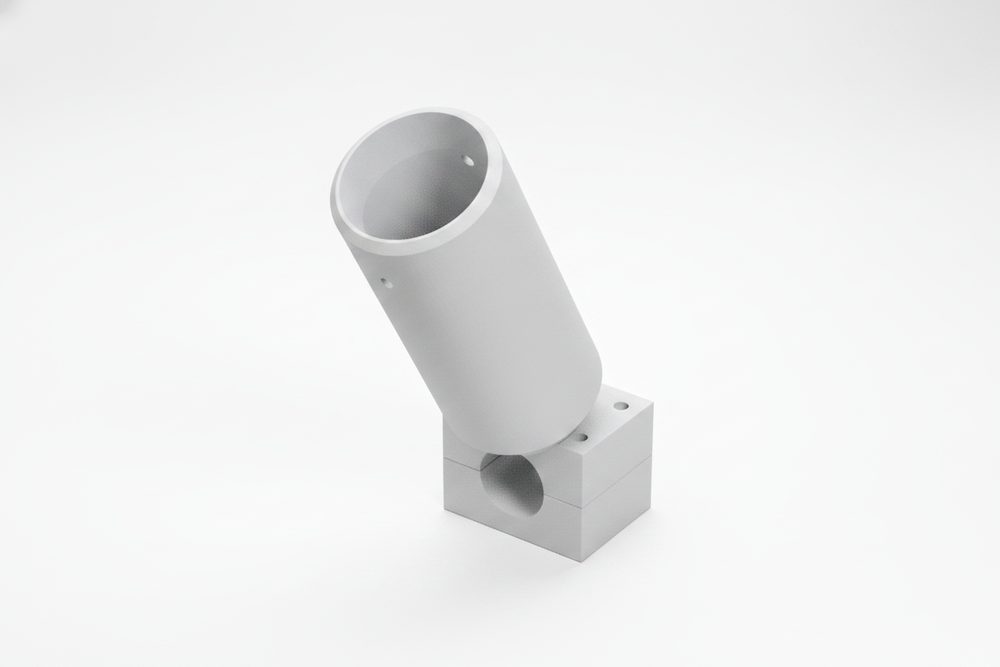
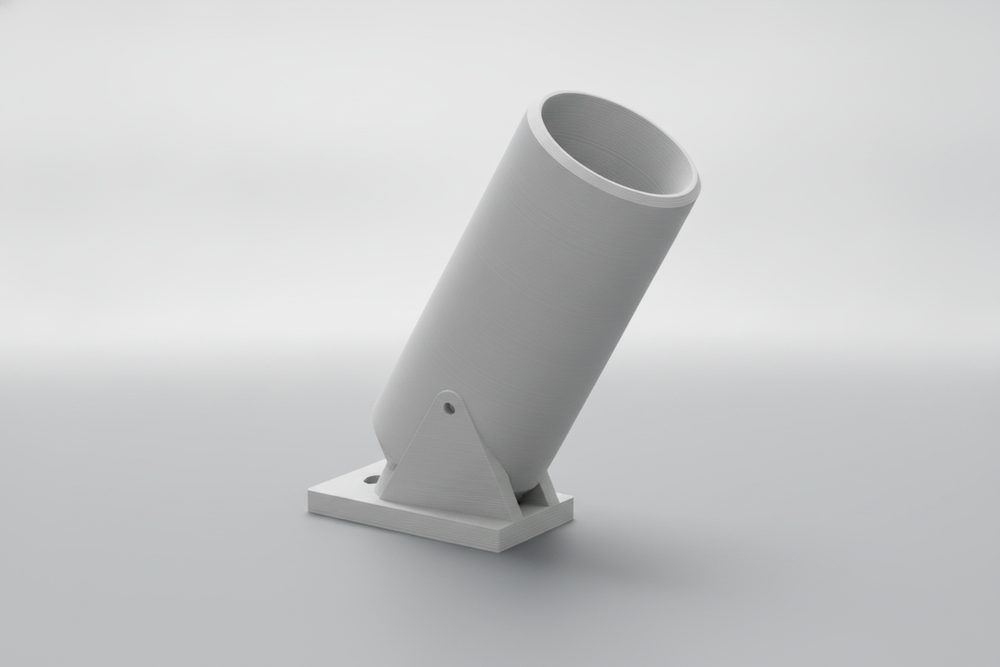
Look at what's fastened to your gunwale before you order. A length of slotted 1" track — YakAttack GearTrak, RAILBLAZA StarPort track, Scotty's track, the factory Hobie H-Track — means the Track Rod Tube ($7): it slides stainless T-nuts into the track and bolts down through slotted holes. A round accessory rail, common on sit-on-tops and fishing-specific hulls, means the Rail Rod Tube ($8) instead — a two-piece clamp built around a roughly 25 mm rail, with a required rubber shim to take up slack on anything a little under that. The two bases aren't interchangeable — confirm your hardware first.
The 30° rake: why the tube leans back
Both bases hold the tube at a fixed 30° backward rake instead of straight up, keeping the rod out of your paddling stroke while the tip still clears your deck gear. The rim is funnelled for a one-handed drop-in, and a drain hole at the base lets rain and spray run out instead of pooling around the butt — worth keeping clear if the mount lives on the kayak between trips.
Ø40 vs Ø50: picking the right tube
Each base comes in two tube diameters. Standard Ø40 — Track Rod Tube ($7) or Rail Rod Tube ($8) — comfortably fits most spinning and casting rod butts. Ø50 — Track Rod Tube Big ($8) or Rail Rod Tube Big ($9) — gives the extra room a thicker cork or EVA butt, a built-up fighting butt, or a chunkier handle needs. There's no single cutoff that covers every rod, so measure your actual rod butt against the two diameters rather than guessing from the line-class rating; when it's close, size up.
Mounting it: stainless hardware, hand-tight
Track base
Buy stainless slide nuts (T-nuts) sized to your track brand plus 2 × M6 stainless bolts and washers — none of it ships with the mount. Slide the nuts into the track, drop the plate over them, seat a washer in each counterbore, and thread the bolts through the slotted holes. Snug hand-tight and stop — overtightening strips the printed slot or cracks the plate. Re-check after your first trip.
Rail base
Buy 4 × M5 stainless bolts (roughly 35–45 mm) and 4 × M5 stainless nyloc nuts — again, not included. Wrap a strip of bicycle inner tube around the rail first; this rubber shim is required, not optional — it grips, protects the rail, and takes up slack on rails a little under 25 mm. Drop the nuts into the captive hex pockets in the lower shell, sandwich the rail between both shells, and run the four bolts down evenly, corner to corner, until the rubber is firmly compressed and the clamp won't rotate. Snug and even, not crushing — saltwater corrodes plated hardware-store bolts fast, so stainless is worth it either way.
Material and printing: PETG, walls, and supports
Print in PETG. It's tougher than PLA, handles being wet without issue, and doesn't go soft on a dark kayak deck in summer sun the way PLA can. A kayak accessory lives outside for whole seasons, so UV matters: PETG or ASA are the right calls, and ASA has a slight edge on long-term UV resistance. A coat of UV-resistant spray or paint stretches either one's life further — check each season for chalking or fine cracks. See our PETG vs PLA guide for the full comparison, and our printer guide for what to print it on.
Print it conservatively — this is a load-bearing bracket: at least 4 perimeters, 40% infill or higher, hot enough for strong layer bonding (PETG typically 240–250 °C) so it doesn't split along a layer line. The tube overhangs at that 30° rake, so the track base and the rail's upper shell both need supports underneath it — tree or organic supports work well and come off cleanly. The rail's lower shell is the one part that prints support-free.
What this mount is — and isn't
This is a printed plastic part with no load rating and no tested strength. What it holds depends on your printer, filament, wall count and infill, and the bolts and track or rail you use — none of which we can verify from here. We haven't run destructive load testing on this exact combination before putting it on sale, and we won't publish a number until we have real data. Treat it as a convenient rod rest, not a rated fastening point.
It is not a securing device and not a safety device. Always run a leash — a cord or strap through the two holes near the tube's rim, clipped to your kayak — every time a rod goes in it. A rod can lift out over a wave, a bolt can work loose, a print can crack; the leash is what actually keeps the rod. Don't hang your weight on it, don't use it as a grab handle, and work a big fish in your hands rather than against the mount.
- Check all bolts every few trips and at the start of each season — vibration and UV both loosen and age a printed mount.
- Reprint if you see cracking, crazing, chalky or faded plastic, or a tube gone soft or flexier than new. The file is yours; a fresh reprint costs a few hours and a little filament — far less than losing a rod.
 Stainless screw assortmentMounting hardware — stainless for anything near water.
 PETG filament 1.75 mmThe material we design for — tough, water-safe, easy to print.
Frequently asked
Will it fit my kayak?
Depends what's already bolted to your gunwale. The track mount fits standard 1" gear track — YakAttack GearTrak, RAILBLAZA StarPort track, Scotty's track, and the factory Hobie H-Track all use this profile. The rail mount is a clamp built around a roughly 25 mm round rail; a required rubber shim (a strip of bicycle inner tube) takes up slack if your rail runs a little under that. Check which hardware your kayak actually has before ordering — the two bases are not interchangeable.
Is printed plastic strong enough to hold my rod?
This is a printed plastic part with no load rating and no tested strength — how much it holds depends on your printer, filament, wall count and infill, and the bolts and track or rail you use, none of which we can see from here. We haven't run destructive load testing on this exact setup before it went on sale, and we won't publish a number until we have real data. Treat it as a rod rest, not a rated fastening point, and always run a leash through the rim holes to your kayak — the leash, not the mount, is what actually keeps the rod if it lifts out.
What hardware do I need to buy?
None of it is included or printed. The track mount needs stainless T-nuts sized to your track brand plus 2 × M6 stainless bolts and washers. The rail mount needs 4 × M5 stainless bolts (about 35–45 mm) and 4 × M5 stainless nyloc nuts, plus a rubber shim cut from a bicycle inner tube. Use stainless specifically — saltwater spray corrodes plated hardware-store bolts fast, and a corroded bolt on a mount over the water is the wrong place to save money.
Which material should I print it in?
PETG. It's tougher than PLA, shrugs off getting wet, and doesn't soften in a hot car or on a sun-baked deck the way PLA can. A kayak mount lives outside for entire seasons, so UV matters here — PETG or ASA are the right calls, and ASA has a slight edge on long-term UV resistance if you already print it. A coat of UV-resistant spray or paint extends either material's life further.
Ø40 or Ø50 — which tube size do I need?
Ø40 (the standard Track Rod Tube or Rail Rod Tube) comfortably fits most spinning and casting rod butts. Ø50 (the Big versions) gives extra room for a thicker cork or EVA handle, a built-up fighting butt, or anything chunkier. There's no single cutoff that covers every rod, so measure your actual rod butt against the two diameters rather than guessing from the rod's line-class rating — if it's close, size up.
Every Fishing3D file ships with the guides that match it — print profiles, assembly, sealing, tuning. Ordering opens soon — leave your email for a single heads-up.